Alternating cable cast on in the round is a great way to make 1×1 ribbing with a rolled edge, similar to tubular cast on. Follow this step-by-step tutorial to master the technique.
Supplies
- Double pointed knitting needles or circular knitting needles
- Yarn required for the pattern
Step-by-Step Guide
Step 1: Make a Slip Knot
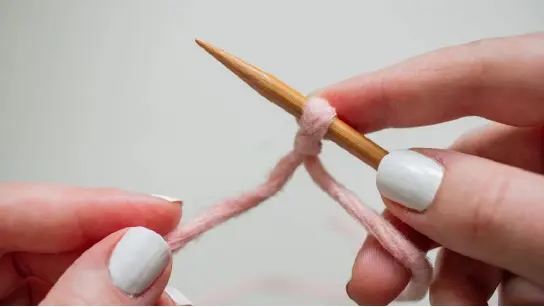
- Make a Slip Knot:
- Take a length of yarn and create a loop.
- Pull the yarn through the loop to make a knot.
- Tighten the knot to create a slip knot.
- Place this slip knot on your right-hand needle.
- Remember, you only need a tail long enough to weave in later.
Step 2: Insert Left-Hand Needle

- Insert Left-Hand Needle Knitwise:
- Insert your left-hand needle into the slip knot knitwise (as if you are going to knit).
- Hold the working yarn (the yarn connected to the ball) in your right hand.
Step 3: Pull Yarn Through
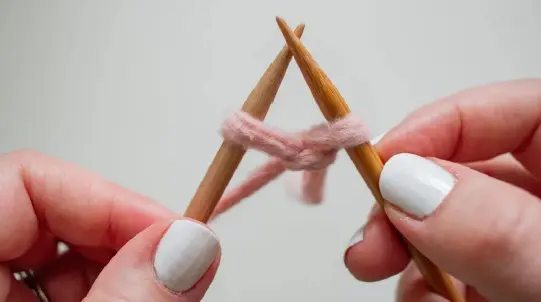
- Yarn Over and Create a New Loop:
- Wrap the yarn over the left-hand needle.
- Pull the yarn through the slip knot to create a new loop.
Step 4: Place New Loop
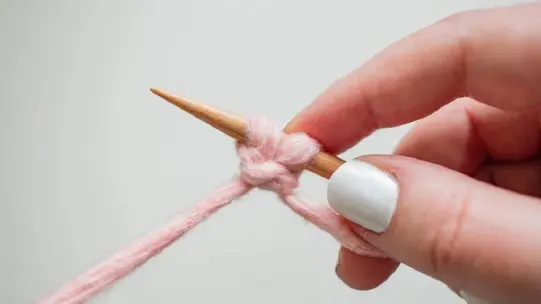
- Place the New Loop on the Right-Hand Needle:
- Carefully slide this new loop over to the right-hand needle, next to the slip knot.
Step 5: Start the Repeat – Insert Left-Hand Needle Purlwise

- Insert Left-Hand Needle Purlwise:
- Insert your left-hand needle between the last two loops on the right-hand needle purlwise (as if you are going to purl).
- Wrap the yarn over the left-hand needle from front to back.
Step 6: Pull Yarn Through
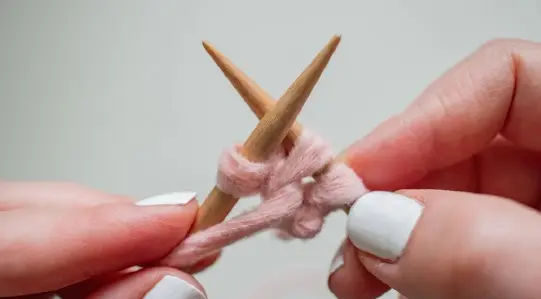
- Create a New Loop:
- Pull the yarn through to create another loop.
Step 7: Place the New Loop on the Right-Hand Needle
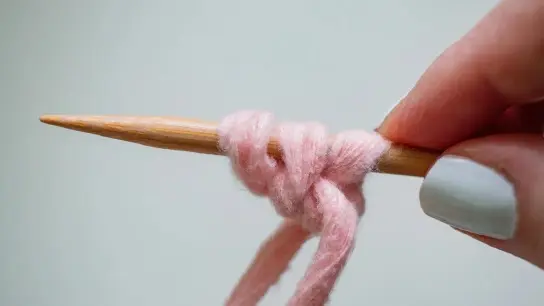
- Slide the Loop Over:
- Carefully slide this new loop over to the right-hand needle.
Step 8: Insert Left-Hand Needle Knitwise

- Insert Left-Hand Needle Knitwise:
- Insert your left-hand needle between the last two loops on the right-hand needle knitwise.
- Wrap the yarn over the left-hand needle from back to front.
Step 9: Pull Yarn Through
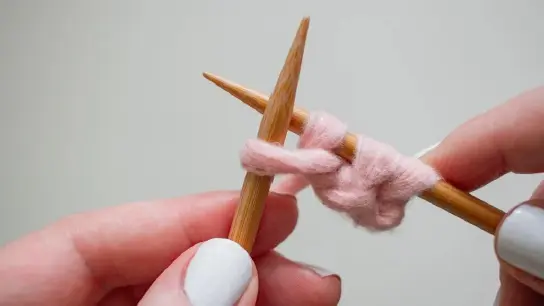
- Pull Yarn Through for New Loop:
- Pull the yarn through to create another loop.
Step 10: Place the New Loop on the Right-Hand Needle
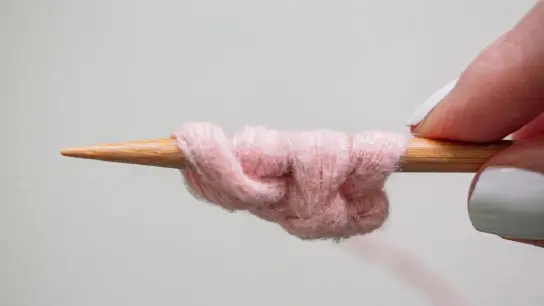
- Place Loop on Right-Hand Needle:
- Slide the new loop over to the right-hand needle.
Step 11: Repeat Steps 5-10
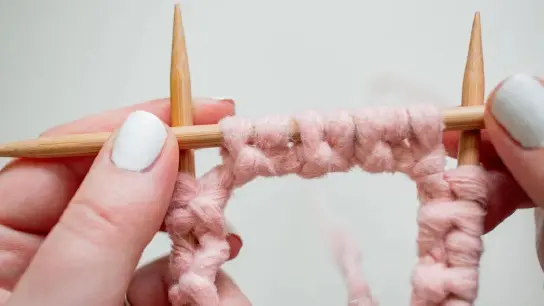
- Continue the Pattern:
- Repeat steps 5-10 until you have the required number of stitches.
- To keep track of which stitch you last worked:
- If your working yarn is in front, it’s a purl stitch.
- If your working yarn is in back, it’s a knit stitch.
- When examining your stitches:
- Stitches that resemble a twisted “v” sitting forward are knit stitches.
- Stitches with a straight across bump sitting a little behind are purl stitches.
Step 12: Join in the Round
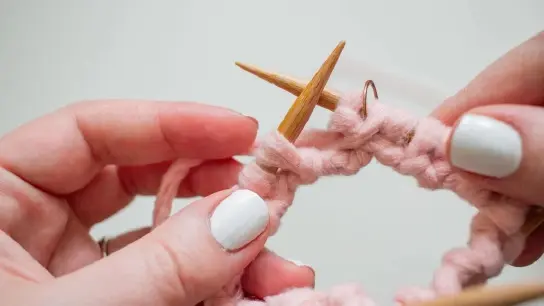
- Join in the Round and Place Marker:
- Carefully join your work in the round by knitting the first stitch together with the slip knot.
- Place a stitch marker to indicate the beginning of your round.
- Note that the first stitch will always be a purl stitch to maintain the ribbing pattern.
Step 13: Ribbing Pattern

- Work the Ribbing Pattern:
- Continue in a p1, k1 (purl 1, knit 1) rib pattern around.
- Repeat p1, k1 until you complete the desired length for your project.
Tips for Success
- Tension: Keep an even tension as you cast on to ensure the edge looks uniform.
- Marker: Use stitch markers to help track the beginning of your round.
- Counting Stitches: Regularly count your stitches to ensure you have the correct number for your pattern.
- Practice: If you are new to this cast on method, practice a few times to get comfortable with the technique.
By following these expanded steps, you’ll achieve a neat and beautiful alternating cable cast on that sets the foundation for a professional finish to your knitted projects. Enjoy your knitting!


